Skip to content

返回 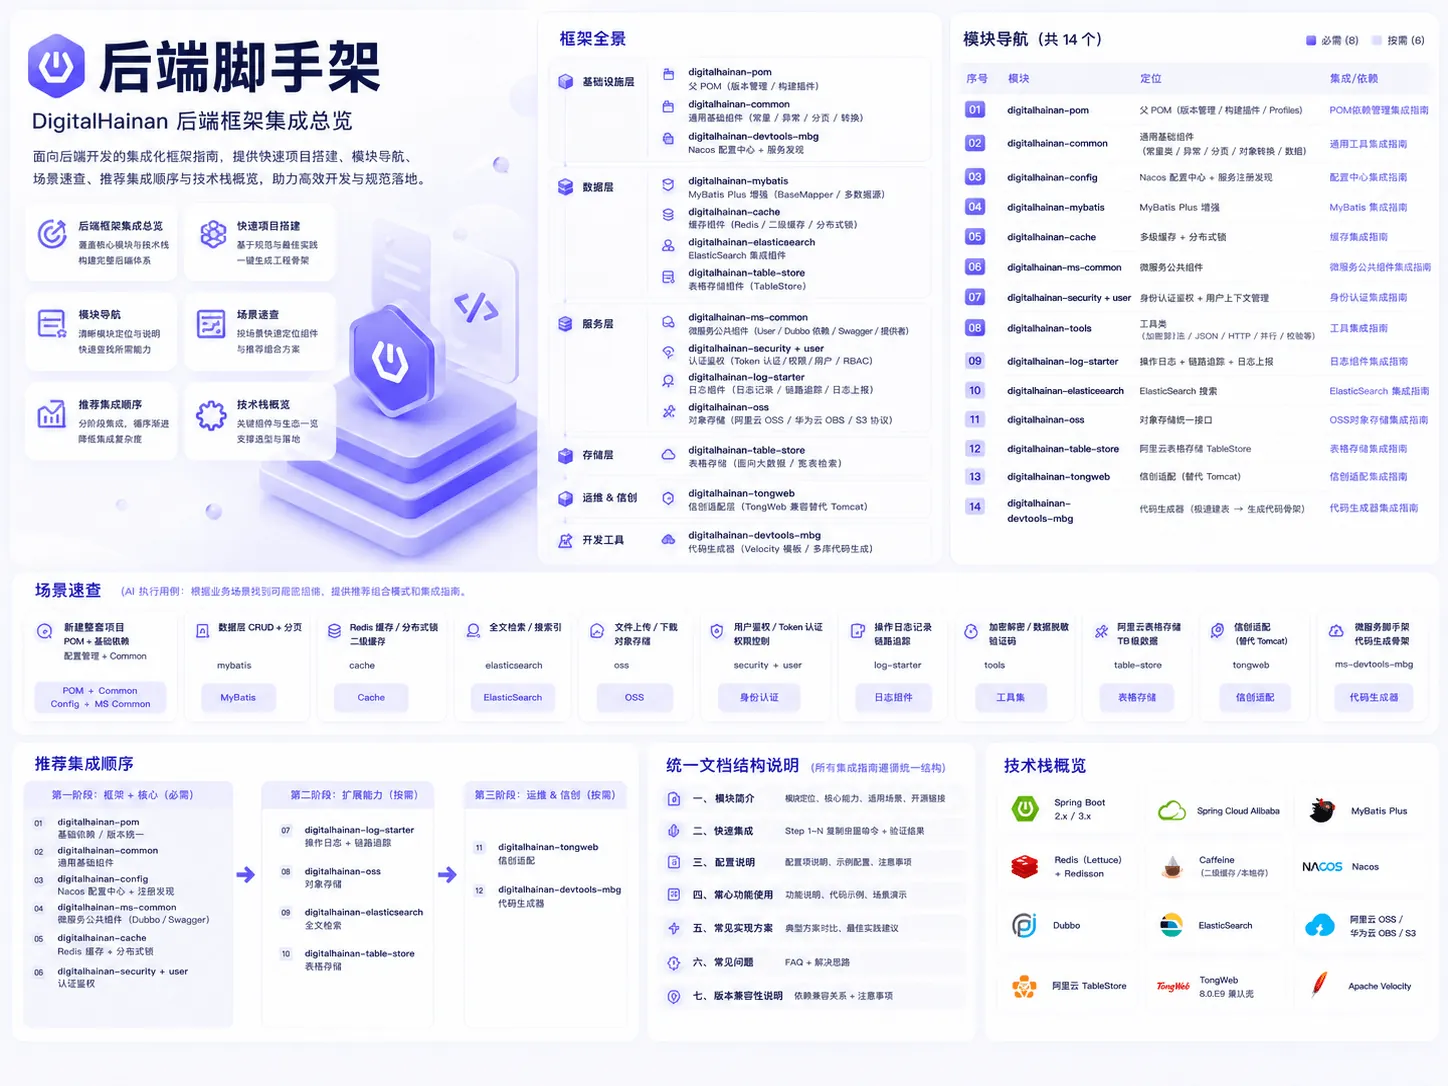
5.1.3.1 缓存管理配置
5.1.3.2 Redis 组件配置
方式一:
方式二:
Q2:
Q4:
后端脚手架
脚手架DigitalHainan Spring 微服务框架脚手架与集成指南,覆盖 POM、缓存、MyBatis、认证、OSS 等核心模块。
概述
digitalhainan-cache
本文档用于指导在目标项目中完成
digitalhainan-cache模块集成。执行顺序:
- 先完成「5.1.2 快速集成」的全部步骤(必须)
- 根据业务需求,查阅「功能集成决策索引」选择对应路径,逐项实现
- 遇到配置问题时参考「5.1.3 配置属性参考」
- 出现异常时查阅「5.1.6 常见问题」
代码约定: 所有代码示例均包含完整
import路径和类声明,可直接用于代码生成。
5.1.1 模块简介
cache-spring-boot-starter 是数字海南框架的统一缓存组件,集成 Redis(Lettuce)+ Redisson + Caffeine,提供以下能力:
- Redis 数据操作(Value / Hash / Set / List)
- Spring Cache 注解自动管理(
@Cacheable/@CachePut/@CacheEvict) - Caffeine + Redis 二级缓存(L1 本地 + L2 分布式)
- 分布式锁(
@DLock注解 /IDistributedLock接口) - 字典数据缓存、验证码缓存、库存扣减、序列号生成
Maven 坐标:
xml
<dependency>
    <groupId>cn.com.digitalhainan</groupId>
    <artifactId>cache-spring-boot-starter</artifactId>
    <version>${digitalhainan-cache.version}</version>
</dependency>前置依赖(项目 pom.xml 中必须已有):
| 依赖 | 说明 |
|---|---|
digitalhainan-pom | 父 POM,统一管理版本号与依赖 |
digitalhainan-common | 通用工具与异常定义 |
digitalhainan-tools | 验证码等工具抽象接口 |
当前版本: 3.1.0-SNAPSHOT
5.1.2 快速集成
目标: 完成以下 4 个步骤后,项目即具备 Redis 缓存能力。
5.1.2.1 添加 Maven 依赖
操作: 在项目 pom.xml 的 <dependencies> 中添加:
xml
<dependency>
    <groupId>cn.com.digitalhainan</groupId>
    <artifactId>cache-spring-boot-starter</artifactId>
</dependency>版本号由
digitalhainan-pom统一管理,无需在此指定<version>。
5.1.2.2 添加 Redis 连接配置
操作: 在 application.yml(或 Nacos 配置)中添加:
yaml
digitalhainan:
  component:
    redis:
      multi-node:
        master:
          host: 127.0.0.1      # Redis 主机地址
          port: 6379            # Redis 端口
          password: your_password  # Redis 密码,无密码则删除此行
          database: 0           # 使用的数据库编号
          lettuce:
            pool:
              max-idle: 8
              min-idle: 0
              max-active: 8
max-wait: -1注意:
master是必须配置的主节点名称。如需多节点,在multi-node下追加其他节点(如pubDat、slave)。
5.1.2.3 创建验证代码
操作: 在项目中创建任意 Spring Bean,注入 RedisTemplatePrivateWrapper 并执行读写:
java
package com.example.demo;

import cn.com.digitalhainan.cache.component.redis.RedisTemplatePrivateWrapper;
import org.springframework.beans.factory.annotation.Autowired;
import org.springframework.stereotype.Component;

@Component
public class CacheVerifier {

    @Autowired
    private RedisTemplatePrivateWrapper masterRedisPrivate;

    public boolean verify() {
        // 写入一个永不过期的 Key
        masterRedisPrivate.valuePut("integration:test", "pong", -1L);
        // 读取并校验
        Object result = masterRedisPrivate.valueGet("integration:test");
        return "pong".equals(result);
    }
}5.1.2.4 验证集成成功
操作: 启动项目,检查以下条件:
| 检查项 | 预期结果 |
|---|---|
| 启动日志 | 出现 CacheManageAutoConfiguration 加载日志,无 Redis 连接异常 |
调用 verify() | 返回 true |
| Redis 中查看 | 存在 Key {spring.application.name}:integration:test,值为 "pong" |
如果启动失败,参考「5.1.6 常见问题 Q1」排查 Redis 连接问题。
5.1.3 配置属性参考
5.1.3.1 缓存管理配置 digitalhainan.cache.*
| 参数 | 默认值 | 说明 | 示例值 |
|---|---|---|---|
store-type | REDIS | 缓存存储类型,决定使用单级 Redis 缓存还是 Caffeine+Redis 二级缓存 | REDIS |
default-expire-time | 1800 | 全局默认缓存过期时间,单位秒;-1 表示永不过期 | 3600 |
redis-expire-listen | false | 是否开启 Redis Key 过期事件监听(用于二级缓存 L1 失效同步) | true |
level2-cache.notify-model | LEVEL1 | 二级缓存集群通知模式(见下方枚举说明) | ALL |
level2-cache.channel | {spring.application.name}:default | 二级缓存 Redis Pub/Sub 通道名称,自动拼接应用名前缀 | myapp:cache-sync |
cache-names.{name}.auto-manage | false | 该缓存组是否启用 Spring Cache 注解自动管理(@Cacheable 等) | true |
cache-names.{name}.expire-time | 1800 | 该缓存组过期时间,单位秒;-1 表示永不过期 | 36000 |
pub-dat.node-name | pubDat | 公共数据字典使用的 Redis 节点名称,需与 multi-node 中的 key 对应 | pubDat |
stock.activities.{name}.start | - | 库存活动开始时间 | 2024-01-01 00:00:00 |
stock.activities.{name}.end | - | 库存活动结束时间 | 2024-12-31 23:59:59 |
stock.activities.{name}.user-limit-count | 1 | 单用户限购数量 | 2 |
stock.activities.{name}.stock-number | - | 活动库存总量 | 1000 |
store-type 可选值:
| 枚举值 | 说明 |
|---|---|
REDIS | 单级 Redis 缓存,使用 FixedAutoRedisCacheManager 管理 Spring Cache |
LEVEL2 | 二级缓存(Caffeine L1 + Redis L2),使用 Level2CacheManager 管理,支持集群同步 |
level2-cache.notify-model 可选值:
| 枚举值 | 说明 |
|---|---|
LEVEL1 | 仅通知清除 L1(Caffeine)本地缓存,L2(Redis)数据保持不变 |
LEVEL2 | 仅通知清除 L2(Redis)缓存 |
ALL | 同时通知清除 L1 和 L2 缓存 |
cache-names 配置说明:
YAML 中使用 - 替代 :(Spring Boot PropertyName 规则限制),框架内部自动转换。例如 modulea-usertest 实际对应缓存名 modulea:usertest。
- 自动管理缓存组(
auto-manage: true):仅支持两级命名(组名:功能点),配合@Cacheable等注解使用 - 手动管理缓存组(
auto-manage: false):支持多级命名,用于手动put/get操作
5.1.3.2 Redis 组件配置 digitalhainan.component.redis.*
| 参数 | 默认值 | 说明 | 示例值 |
|---|---|---|---|
enable | true | 是否启用 Redis 组件,设为 false 则跳过所有缓存自动配置 | true |
multi-node.{name}.host | - | Redis 节点主机地址 | 127.0.0.1 |
multi-node.{name}.port | 6379 | Redis 端口 | 6379 |
multi-node.{name}.password | - | Redis 密码,为空则不认证 | your_password |
multi-node.{name}.database | 0 | Redis 数据库编号 | 0 |
multi-node.{name}.url | - | Redis URL 格式连接串(与 host/port 二选一) | redis://user:password@localhost:6379 |
multi-node.{name}.lettuce.pool.max-idle | 8 | 连接池最大空闲连接数 | 8 |
multi-node.{name}.lettuce.pool.min-idle | 0 | 连接池最小空闲连接数 | 0 |
multi-node.{name}.lettuce.pool.max-active | 8 | 连接池最大活跃连接数 | 16 |
multi-node.{name}.lettuce.pool.max-wait | -1 | 连接池获取连接最大等待时间,-1 表示无限等待 | -1 |
multi-node.{name}.cluster.nodes | - | 集群模式节点列表(逗号分隔) | host1:6379,host2:6379 |
multi-node.{name}.cluster.max-redirects | - | 集群模式最大重定向次数 | 3 |
multi-node.{name}.sentinel.master | - | Sentinel 模式主节点名称 | mymaster |
multi-node.{name}.sentinel.nodes | - | Sentinel 节点列表(逗号分隔) | host1:26379,host2:26379 |
multi-redisson.{name} | - | Redisson YAML 配置文件路径,需与 multi-node 中的 key 对应 | classpath:redisson-node.yml |
5.1.3.3 完整 YAML 示例
yaml
digitalhainan:
  cache:
    store-type: REDIS
    default-expire-time: 1800
    redis-expire-listen: false
    level2-cache:
      notify-model: LEVEL1
      channel: cache-sync
    cache-names:
      # 自动管理缓存组(配合 @Cacheable 等注解)
      modulea-usertest:
        auto-manage: true
        expire-time: 36000
      # 手动管理缓存组(配合 ManualCacheName 手动操作)
      modulea-manualtest:
        auto-manage: false
        expire-time: 36000
    pub-dat:
      node-name: pubDat
    stock:
      activities:
        seckill-activity:
          start: 2024-01-01 00:00:00
          end: 2024-12-31 23:59:59
          user-limit-count: 1
          stock-number: 1000
  component:
    redis:
      enable: true
      multi-node:
        master:
          host: 127.0.0.1
          port: 6379
          password: your_password
          database: 0
          lettuce:
            pool:
              max-idle: 8
              min-idle: 0
              max-active: 8
              max-wait: -1
        pubDat:
          host: 127.0.0.1
          port: 6379
          password: your_password
          database: 1
          lettuce:
            pool:
              max-idle: 8
              min-idle: 0
              max-active: 8
max-wait: -15.1.4 核心功能使用
功能集成决策索引
AI 执行指引: 先完成「5.1.2 快速集成」,然后根据业务需求在下表中找到对应路径,跳转到对应小节实现。
| 业务需求 | 集成路径 | 前置条件 |
|---|---|---|
| 手动读写 Redis 数据(Value/Hash/Set/List) | 4.1 | 完成第二章 |
| 方法级缓存(查缓存/写缓存/删缓存) | 4.2 | 完成第二章 + 配置 cache-names |
| 高性能本地+远程二级缓存 | 4.3 | 完成第二章 + 配置 store-type=LEVEL2 |
| 并发安全 / 防重复提交 | 4.4 | 完成第二章 |
| 系统字典项缓存查询 | 4.5 | 完成第二章 + 配置 pub-dat 节点 |
| 图形验证码生成与校验 | 4.6 | 完成第二章 + 配置 captcha 缓存组 |
| 秒杀 / 限购库存扣减 | 4.7 | 完成第二章 + 配置 stock.activities |
| 全局唯一业务单号 / 序列号 | 4.8 | 完成第二章 |
5.1.4.1 Redis 操作
适用场景: 需要在代码中手动 put/get/delete Redis 数据。
框架提供三种 RedisTemplate 包装类,区别在于 Key 前缀策略:
| Wrapper 类 | Bean 名称 | Key 前缀 | 适用场景 |
|---|---|---|---|
RedisTemplatePrivateWrapper | masterRedisPrivate | {spring.application.name}: | 私有存储,业务数据隔离 |
RedisTemplatePublicWrapper | masterRedisPublic | pub-dat: | 公共数据存储(如字典、跨服务共享) |
RedisTemplateEmptyWrapper | masterRedisEmpty | 无 | 旧系统兼容,新业务不推荐使用 |
完整代码示例:
java
package com.example.service;

import cn.com.digitalhainan.cache.component.redis.RedisTemplatePrivateWrapper;
import cn.com.digitalhainan.cache.component.redis.RedisTemplatePublicWrapper;
import cn.com.digitalhainan.cache.component.redis.RedisTemplateEmptyWrapper;
import cn.com.digitalhainan.cache.component.redis.conf.RedisWrapperBeanFactory;
import cn.com.digitalhainan.cache.component.redis.conf.RedissonBeanFactory;
import org.redisson.api.RLock;
import org.redisson.api.RedissonClient;
import org.springframework.beans.factory.annotation.Autowired;
import org.springframework.stereotype.Service;

import java.util.*;

@Service
public class RedisOperationDemo {

    // ===== 注入 Master 节点 Wrapper =====
    @Autowired
    private RedisTemplatePrivateWrapper masterRedisPrivate;  // Key 前缀: {appName}:
    @Autowired
    private RedisTemplatePublicWrapper masterRedisPublic;    // Key 前缀: pub-dat:
    @Autowired
    private RedisTemplateEmptyWrapper masterRedisEmpty;      // 无前缀

    // ===== 注入 Bean 工厂(用于获取非 master 节点) =====
    @Autowired
    private RedisWrapperBeanFactory redisWrapperBeanFactory;
    @Autowired
    private RedissonBeanFactory redissonBeanFactory;

    // ===== 注入 RedissonClient(用于分布式锁等原生 Redisson 操作) =====
    @Autowired
    private RedissonClient masterRedisson;

    public void valueOperations() {
        // --- Value 操作 ---
        masterRedisPrivate.valuePut("user:1001", "张三", 3600L);   // 设置值,3600秒过期
        masterRedisPrivate.valuePut("user:1002", "李四", -1L);     // 设置值,永不过期
        Object val = masterRedisPrivate.valueGet("user:1001");      // 获取值
    }

    public void jsonOperations() {
        // --- JSON 序列化操作(适合复杂对象) ---
        User user = new User("1001", "张三");
        masterRedisPrivate.beanJsonPut("user:json:1001", user, 3600L);
        User cached = masterRedisPrivate.beanFromJsonGet("user:json:1001", User.class);
    }

    public void hashOperations() {
        // --- Hash 操作 ---
        Map<String, Object> fields = new HashMap<>();
        fields.put("name", "张三");
        fields.put("age", 25);
        masterRedisPrivate.hashPutAll("user:hash:1001", fields, 3600L);
        Map<String, Object> all = masterRedisPrivate.hashEntriesGet("user:hash:1001");
        Set<String> keys = masterRedisPrivate.hashKeysGet("user:hash:1001");
    }

    public void setOperations() {
        // --- Set 操作 ---
        Set<Object> tags = new HashSet<>(Arrays.asList("tag1", "tag2", "tag3"));
        masterRedisPrivate.setPutAll("user:set:1001", tags, 3600L);
        Set<Object> members = masterRedisPrivate.setValuesGet("user:set:1001");
    }

    public void listOperations() {
        // --- List 操作 ---
        List<Object> items = Arrays.asList("item1", "item2", "item3");
        masterRedisPrivate.listPutAll("user:list:1001", items, 3600L);
        List<Object> values = masterRedisPrivate.listValuesGet("user:list:1001");
    }

    public void multiNodeOperations() {
        // --- 获取非 master 节点的 Wrapper ---
        // 前提: application.yml 中 multi-node 下配置了名为 "pubDat" 的节点
        RedisTemplatePrivateWrapper pubDatPrivate =
            redisWrapperBeanFactory.getExcludeMasterRedisPrivateWrapperBean("pubDat");
        RedisTemplatePublicWrapper pubDatPublic =
            redisWrapperBeanFactory.getExcludeMasterRedisPublicWrapperBean("pubDat");
        RedisTemplateEmptyWrapper pubDatEmpty =
            redisWrapperBeanFactory.getExcludeMasterRedisEmptyWrapperBean("pubDat");
        // 获取非 master 节点的 RedissonClient
        RedissonClient pubDatRedisson =
            redissonBeanFactory.getExcludeMasterRedissonBean("pubDat");
    }

    public void fuzzyDelete() {
        // --- 模糊匹配删除 ---
        masterRedisPrivate.getLikeKey("user:*", true);  // 匹配 "user:*" 并删除
    }
}验证: 调用任意方法后,使用 Redis 客户端查看对应 Key 是否存在。
5.1.4.2 Spring Cache 注解
适用场景: 需要在 Service 方法上声明式缓存(查缓存/写缓存/删缓存)。 前置配置: 必须在
application.yml中配置cache-names且auto-manage: true。
Step 1: 配置缓存组
在 application.yml 中添加(注意用 - 替代 :):
yaml
digitalhainan:
  cache:
    cache-names:
      user-cache:
        auto-manage: true
expire-time: 3600Step 2: 在 Service 类上使用注解
java
package com.example.service;

import org.springframework.cache.annotation.CacheConfig;
import org.springframework.cache.annotation.CacheEvict;
import org.springframework.cache.annotation.CachePut;
import org.springframework.cache.annotation.Cacheable;
import org.springframework.beans.factory.annotation.Autowired;
import org.springframework.stereotype.Service;

// cacheNames 对应 YAML 中 "user-cache" 转换后的 "user:cache"
@Service
@CacheConfig(cacheNames = "user:cache")
public class UserServiceImpl implements UserService {

    @Autowired
    private UserMapper userMapper;

    @Override
    @Cacheable(key = "#userId")
    // 行为: 先查缓存,命中则直接返回;未命中则执行方法体,并将返回值写入缓存
    public User getUserById(String userId) {
        return userMapper.selectById(userId);
    }

    @Override
    @CachePut(key = "#user.id")
    // 行为: 每次都执行方法体,并将返回值覆盖写入缓存
    public User updateUser(User user) {
        userMapper.updateById(user);
        return user;
    }

    @Override
    @CacheEvict(key = "#userId")
    // 行为: 删除缓存中对应 key 的条目
    public void deleteUser(String userId) {
        userMapper.deleteById(userId);
    }
}命名映射规则(重要):
| 位置 | 写法 | 示例 |
|---|---|---|
YAML cache-names 的 key | 用 - 替代 : | user-cache |
Java @CacheConfig(cacheNames=) | 用实际的 : | "user:cache" |
| 自动管理缓存组 | 仅支持两级 组名:功能点 | user:cache |
| 手动管理缓存组 | 支持多级 | module:sub:feature |
验证: 调用 getUserById 两次,第二次应不执行 SQL(查看日志无 SQL 输出)。
5.1.4.3 二级缓存
适用场景: 需要极高读性能 + 分布式共享,且接受 Caffeine 本地缓存的一致性延迟。 前置配置: 必须将
store-type设为LEVEL2。
Step 1: 修改配置
yaml
digitalhainan:
  cache:
    store-type: LEVEL2    # 切换为二级缓存模式
    redis-expire-listen: true  # 开启 Redis Key 过期监听,用于 L1 失效同步
    level2-cache:
      notify-model: LEVEL1  # 集群环境下仅清除 L1,保持 L2 数据
channel: cache-sync # Pub/Sub 通道名(自动拼接 {appName}: 前缀)Step 2: 使用方式
二级缓存与 Spring Cache 注解使用方式完全相同(@Cacheable 等),框架自动切换为 Level2CacheManager。
手动操作二级缓存:
java
package com.example.service;

import cn.com.digitalhainan.cache.component.level2.Level2Cache;
import cn.com.digitalhainan.cache.component.level2.Level2CacheHolder;
import org.springframework.stereotype.Service;

@Service
public class Level2CacheDemo {

    public void operateLevel2() {
        // 通过 ThreadLocal Holder 获取指定缓存实例
        Level2Cache cache = Level2CacheHolder.holder.get("myCache");

        cache.put("key", "value");       // 同时写入 L1 + L2
        Object val = cache.get("key");   // 先查 L1,未命中再查 L2

        cache.evict("key");              // 清除 L1 + L2
        cache.evictLevel1("key");        // 仅清除 L1(本地)
        cache.evictLevel2("key");        // 仅清除 L2(Redis)
        cache.clearLevel1();             // 清空所有 L1
        cache.clearLevel2();             // 清空所有 L2
    }
}架构说明:
- 读取流程: L1(Caffeine) 命中 -> 返回;未命中 -> 查 L2(Redis) -> 回填 L1 -> 返回
- 写入流程: 同时写入 L1 + L2 -> Pub/Sub 通知集群其他节点清除对应 L1
- 集群同步: 通过
MasterRedisPubSubPolicy实现,所有实例监听同一 Pub/Sub 通道
验证: 调用 put 后检查 Caffeine 本地缓存和 Redis 中均存在该 Key。
5.1.4.4 分布式锁
适用场景: 并发安全、防重复提交、分布式任务调度。
方式一:@DLock 注解(推荐)
java
package com.example.service;

import cn.com.digitalhainan.cache.component.redis.annotation.DLock;
import org.springframework.stereotype.Service;

@Service
public class OrderService {

    // 锁 Key 最终格式: "order:lock:{orderId的值}"
    // 例: orderId="20240101001" -> 锁 Key = "order:lock:20240101001"
    @DLock(prefix = "order:lock", value = "#orderId", waitTime = 50, leaseTime = 90)
    public void processOrder(String orderId) {
        // 该方法在分布式锁保护下执行
        // 如果 50 秒内未获取到锁,抛出 RuntimeException
        // 方法执行完毕或异常后自动释放锁
    }
}@DLock 参数说明:
| 参数 | 默认值 | 说明 |
|---|---|---|
value | - | SpEL 表达式,引用方法参数作为锁 Key 的一部分。支持 #参数名 格式 |
prefix | - | 锁 Key 前缀,建议用业务模块命名 |
waitTime | 50 | 尝试获取锁的最大等待时间(秒)。超时抛出 RuntimeException |
leaseTime | 90 | 锁的自动释放时间(秒)。防止死锁的安全阀 |
方式二:IDistributedLock 接口
java
package com.example.service;

import cn.com.digitalhainan.cache.component.redis.lock.IDistributedLock;
import org.springframework.beans.factory.annotation.Autowired;
import org.springframework.stereotype.Service;

@Service
public class LockDemoService {

    @Autowired
    private IDistributedLock distributedLock;

    public void doSomething() {
        // lockMillisecond: 锁持有时间(毫秒)
        // retryMillisecond: 重试等待时间(毫秒)
        boolean locked = distributedLock.lock(5000L, 3000L);
        try {
            if (locked) {
                // 业务逻辑
            }
        } finally {
            distributedLock.free();  // 必须释放
        }
    }
}验证: 并发调用同一方法,只有一个线程能进入方法体,其他线程等待或超时。
5.1.4.5 字典缓存
适用场景: 系统字典项的高频查询,避免每次查库。 前置配置: 必须在
multi-node中配置pub-dat节点。
java
package com.example.cache;

import cn.com.digitalhainan.cache.common.pubdat.dict.cache.redis.AbstractBasisDictRedisCache;
import cn.com.digitalhainan.cache.common.pubdat.dict.cache.DictItemVO;
import org.springframework.stereotype.Component;

@Component
public class MyDictCache extends AbstractBasisDictRedisCache {

    public DictItemVO getDictItem(String catalog, String itemCode) {
        // targetBasisDictItemKey 生成格式: "{basisDictManualCache名}:{catalog}:{itemCode}"
        String key = targetBasisDictItemKey(catalog, itemCode);
        return (DictItemVO) masterDictRedisPublic.valueGet(key);
    }
}内置接口: 框架自动注册 BasisDictController(路径 /api/basisDict),提供字典查询 REST 接口。
验证: 调用 getDictItem 后确认返回正确的字典项数据。
5.1.4.6 验证码缓存
适用场景: 图形验证码生成后缓存,校验时一次性读取并删除。 前置配置: 必须在
cache-names中配置captcha-cache缓存组(auto-manage: false)。
框架自动注册 RedisCaptchaCacheStrategy 为 ICaptchaCacheStrategy Bean,无需手动配置。
java
package com.example.service;

import cn.com.digitalhainan.tools.captch.ICaptchaCacheStrategy;
import org.springframework.beans.factory.annotation.Autowired;
import org.springframework.stereotype.Service;

@Service
public class CaptchaService {

    @Autowired
    private ICaptchaCacheStrategy captchaCacheStrategy;

    public String generateCaptcha(String sessionId) {
        String code = "1234"; // 实际由验证码生成器产生
        captchaCacheStrategy.cache(sessionId, code);  // 存入 Redis
        return code;
    }

    public boolean verifyCaptcha(String sessionId, String inputCode) {
        // 校验成功后自动删除缓存(一次性)
        return captchaCacheStrategy.verify(sessionId, inputCode);
    }
}验证: 调用 generateCaptcha 后在 Redis 中可找到对应 Key;调用 verifyCaptcha 后 Key 自动删除。
5.1.4.7 库存扣减
适用场景: 秒杀、限时抢购等高并发库存场景。 前置配置: 必须在
application.yml中配置stock.activities。
Step 1: 配置库存活动
yaml
digitalhainan:
  cache:
    stock:
      activities:
        seckill-2024:
          start: 2024-11-11 00:00:00
          end: 2024-11-11 23:59:59
          user-limit-count: 1
stock-number: 500Step 2: 实现库存扣减操作类
java
package com.example.stock;

import cn.com.digitalhainan.cache.common.stock.StockReduceOperator;
import cn.com.digitalhainan.cache.common.stock.StockStatusEnum;
import cn.com.digitalhainan.cache.common.stock.GoodsInfo;
import cn.com.digitalhainan.cache.common.stock.redis.AbstractStockReduceOperator;
import org.springframework.stereotype.Component;

@Component
public class SeckillStockOperator extends AbstractStockReduceOperator {
    // 框架根据 StockActivityProperties 配置自动初始化库存
    // reduce() 方法基于 Redis 原子操作实现库存扣减与限购校验
    // 无需手动实现,继承即可使用
}StockStatusEnum 返回值说明:
| 枚举值 | 说明 |
|---|---|
| 成功 | 库存扣减成功 |
| 库存不足 | 活动库存已耗尽 |
| 超出限购 | 用户已达到限购上限 |
| 活动未开始/已结束 | 不在活动时间范围内 |
验证: 调用 reduce 方法后检查返回值,并确认 Redis 中库存数量正确递减。
5.1.4.8 序列号生成
适用场景: 生成全局唯一的业务单号(订单号、发票号等)。 格式:
{前缀}{yyyyMMddHHmm}{序号},基于 RedisINCR原子自增。
java
package com.example.service;

import cn.com.digitalhainan.cache.component.redis.utils.SerialNumberUtils;
import org.springframework.beans.factory.annotation.Autowired;
import org.springframework.stereotype.Service;

@Service
public class SerialNumberDemo {

    @Autowired
    private SerialNumberUtils serialNumberUtils;

    public String generateOrderNo() {
        // 生成 19 位序列号(默认长度)
        return serialNumberUtils.generate("ORD");
        // 示例输出: ORD202401011430000001
    }

    public String generateInvoiceNo() {
        // 指定总长度为 25 位
        return serialNumberUtils.generate("INV", 25);
        // 示例输出: INV2024010114300000000001
    }
}注意事项:
- 序列号基于 Redis
INCR命令,保证分布式环境下的唯一性 - 同一分钟内的序号自动递增,超过分钟后重新从 1 开始
- 序号 Key 自动设置 10 分钟过期,避免 Redis 内存泄漏
- 前缀不宜过长,确保留给序号的位数充足(至少 4 位)
验证: 调用 generate 后确认返回格式正确,多次调用序号递增。
5.1.5 版本变更记录
v3.1.0(当前版本)
- [修复] 分布式锁异常转换问题(
catch Exception->catch Throwable) - [修复] NPE 修复
v3.0.1
- [变更] 版本号升级
v3.0.0
- [破坏性变更] 适配 Spring Boot 3.x:
- Swagger 注解从
springfox-swagger2(io.springfox)迁移至io.swagger.core.v3 - 新增
META-INF/spring/org.springframework.boot.autoconfigure.AutoConfiguration.imports文件,兼容 Spring Boot 3.x 自动配置发现机制 DistributedLockAspectConfiguration中LocalVariableTableParameterNameDiscoverer替换为StandardReflectionParameterNameDiscoverer(适配 JDK 17+ 反射变更)
- Swagger 注解从
- [新增] 新增
spring-boot-starter-web和guava依赖 - [变更] SwaggerConfiguration 整体注释(待后续适配 OpenAPI v3)
v2.1.0
- [新增] Redis Key 前缀优化
- [修复] 连接校验修复(
setValidateConnection(true)) - [新增] 适配 Swagger 3
v2.0
- [新增] 二级缓存(Caffeine L1 + Redis L2),支持集群 Pub/Sub 同步
- [新增] 验证码缓存(
RedisCaptchaCacheStrategy) - [新增] 字典缓存(
AbstractBasisDictRedisCache+BasisDictController) - [新增] 库存扣减组件(
StockReduceOperator) - [新增] 序列号生成工具(
SerialNumberUtils) - [新增] 多节点 Redis 支持
- [新增] 缓存管理 REST 接口(
CacheManagerController:/api/cacheManager/evict、/api/cacheManager/clear) - [新增] 集群策略抽象(
AbstractClusterPolicy) - [新增] 租户 Key 前缀支持(
RedisKeyPrefixSerializer) - [新增] Snaker 工作流 Redis 缓存集成
- [新增] Groovy 脚本工具(
GroovyScriptUtil) - [新增] 缓存组工厂(
CacheBeanFactory)与构建器(CacheBuilder)
v1.0.0(master)
- 初始版本
- Redis 操作(
RedisTemplatePrivateWrapper/PublicWrapper/EmptyWrapper) @DLock分布式锁注解- Spring Cache 注解支持(
@Cacheable/@CachePut/@CacheEvict) - Redisson 集成
5.1.6 常见问题
Q1: 启动报 Redis 连接失败
排查步骤:
- 检查
digitalhainan.component.redis.multi-node.master配置是否正确(host/port/password) - 确认 Redis 服务可达(
redis-cli ping返回PONG) - 检查
database编号是否在 Redis 配置范围内 - 如使用密码认证,确认密码无特殊字符被 YAML 转义
Q2: @Cacheable 注解不生效
排查步骤:
- 确认
store-type为REDIS(默认值) - 确认对应缓存组配置了
auto-manage: true - 确认注解中的
cacheNames与 YAML 中配置的缓存组名一致(注意 YAML 用-,Java 用:) - 确认启动类或配置类上有
@EnableCaching(框架已自动添加)
Q3: 二级缓存 L1 数据不一致
原因分析: 集群环境下,某节点更新了缓存,其他节点的 L1(Caffeine)仍保留旧值。
解决方案:
- 确保
redis-expire-listen: true已开启 - 检查
level2-cache.channel配置是否正确,确保所有实例使用相同通道 - 确认 Redis Pub/Sub 端口未被防火墙拦截
- 可通过
/api/cacheManager/evict接口手动清除指定缓存
Q4: @DLock 获取锁超时
排查步骤:
- 检查
waitTime是否足够(默认 50 秒) - 检查
leaseTime是否合理(默认 90 秒),过短会导致业务未完成锁已释放 - 检查是否存在死锁(方法内异常未释放锁 —— 框架已用
finally保证释放) - 检查 Redisson 连接是否正常
Q5: 多节点 Redis 获取 Bean 为空
排查步骤:
- 确认
multi-node下配置了对应节点名称(如pubDat) - 确认通过
RedisWrapperBeanFactory.getExcludeMasterRedisPrivateWrapperBean("pubDat")获取 - 确认节点名称拼写与 YAML 中一致
Q6: 序列号重复或超出长度
原因分析: 同一分钟内序号超过可用位数。
解决方案:
- 增大
length参数(默认 19 位) - 前缀不宜过长,确保留给序号的位数充足(至少 4 位)
- 若业务量极大,考虑按业务类型分配不同前缀
5.1.7 版本兼容性矩阵
| cache-spring-boot-starter | Spring Boot | JDK | Redisson | 备注 |
|---|---|---|---|---|
| 3.1.0-SNAPSHOT | 3.2.4 | 21 | 3.52.0 | 当前最新;适配 Spring Boot 3.x 自动配置 |
| 3.0.0 ~ 3.0.1 | 3.2.4 | 21 | 3.52.0 | 首次适配 Spring Boot 3.x + Swagger v3 |
| 2.0 ~ 2.1.0 | 2.2.4.RELEASE | 1.8 | 3.12.3 | 功能最完整的 2.x 版本;新增二级缓存、字典、库存等 |
| 1.0.0(master) | 2.2.4.RELEASE | 1.8 | 3.12.3 | 初始版本;基础 Redis 操作 + 分布式锁 |
升级提示: 从 2.x 升级到 3.x 需注意:
- JDK 需升级至 21
- Spring Boot 需升级至 3.2.x
- Swagger 注解需从
springfox迁移至io.swagger.core.v3- 自动配置发现机制从
spring.factories变更为AutoConfiguration.imports(框架已同时兼容)